

Corporate Roles
Overview
Corporate Roles represent the roles defined by the company. Such roles represent the different groups that take part in the DPM processes. Corporate roles are fully configurable, and each corporation defines roles according to its own organizational structure.
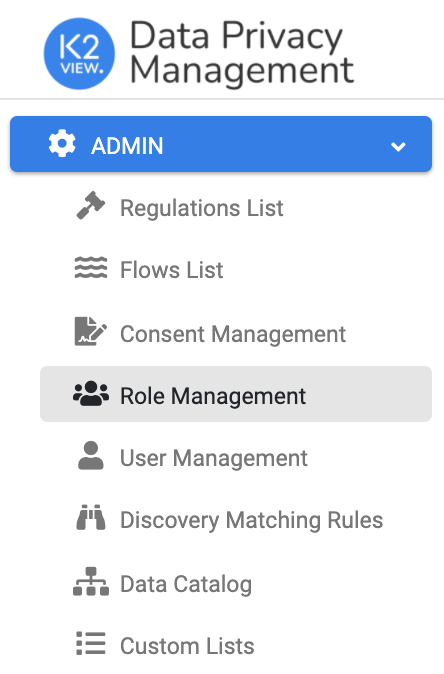
Corporate roles are configured by the DPM Administrator by accessing the Role Management menu option.
The “Corporate Roles” screen displays the list of the corporate roles. When selecting one of the corporate roles, the right side of the screen displays the DPM Application Roles that are enabled for this Corporate Role. For example – A user belongs to the “Legal Fulfilment” group and is responsible to work on Tasks as part of the fulfilment process. Performing a Task is defined as part of the Steward Application Roles. So, for the user to perform a Task, the DPM Administrator acts to:
Create a Corporate Role to represent the Legal team, called “CXM,” as shown by the following example.
Mark this Role to perform the actions grouped under the “Steward” DPM Application Role (on the right side of the screen).
Assign the user to the corporate Role “CXM” (user management is detailed in the next section).
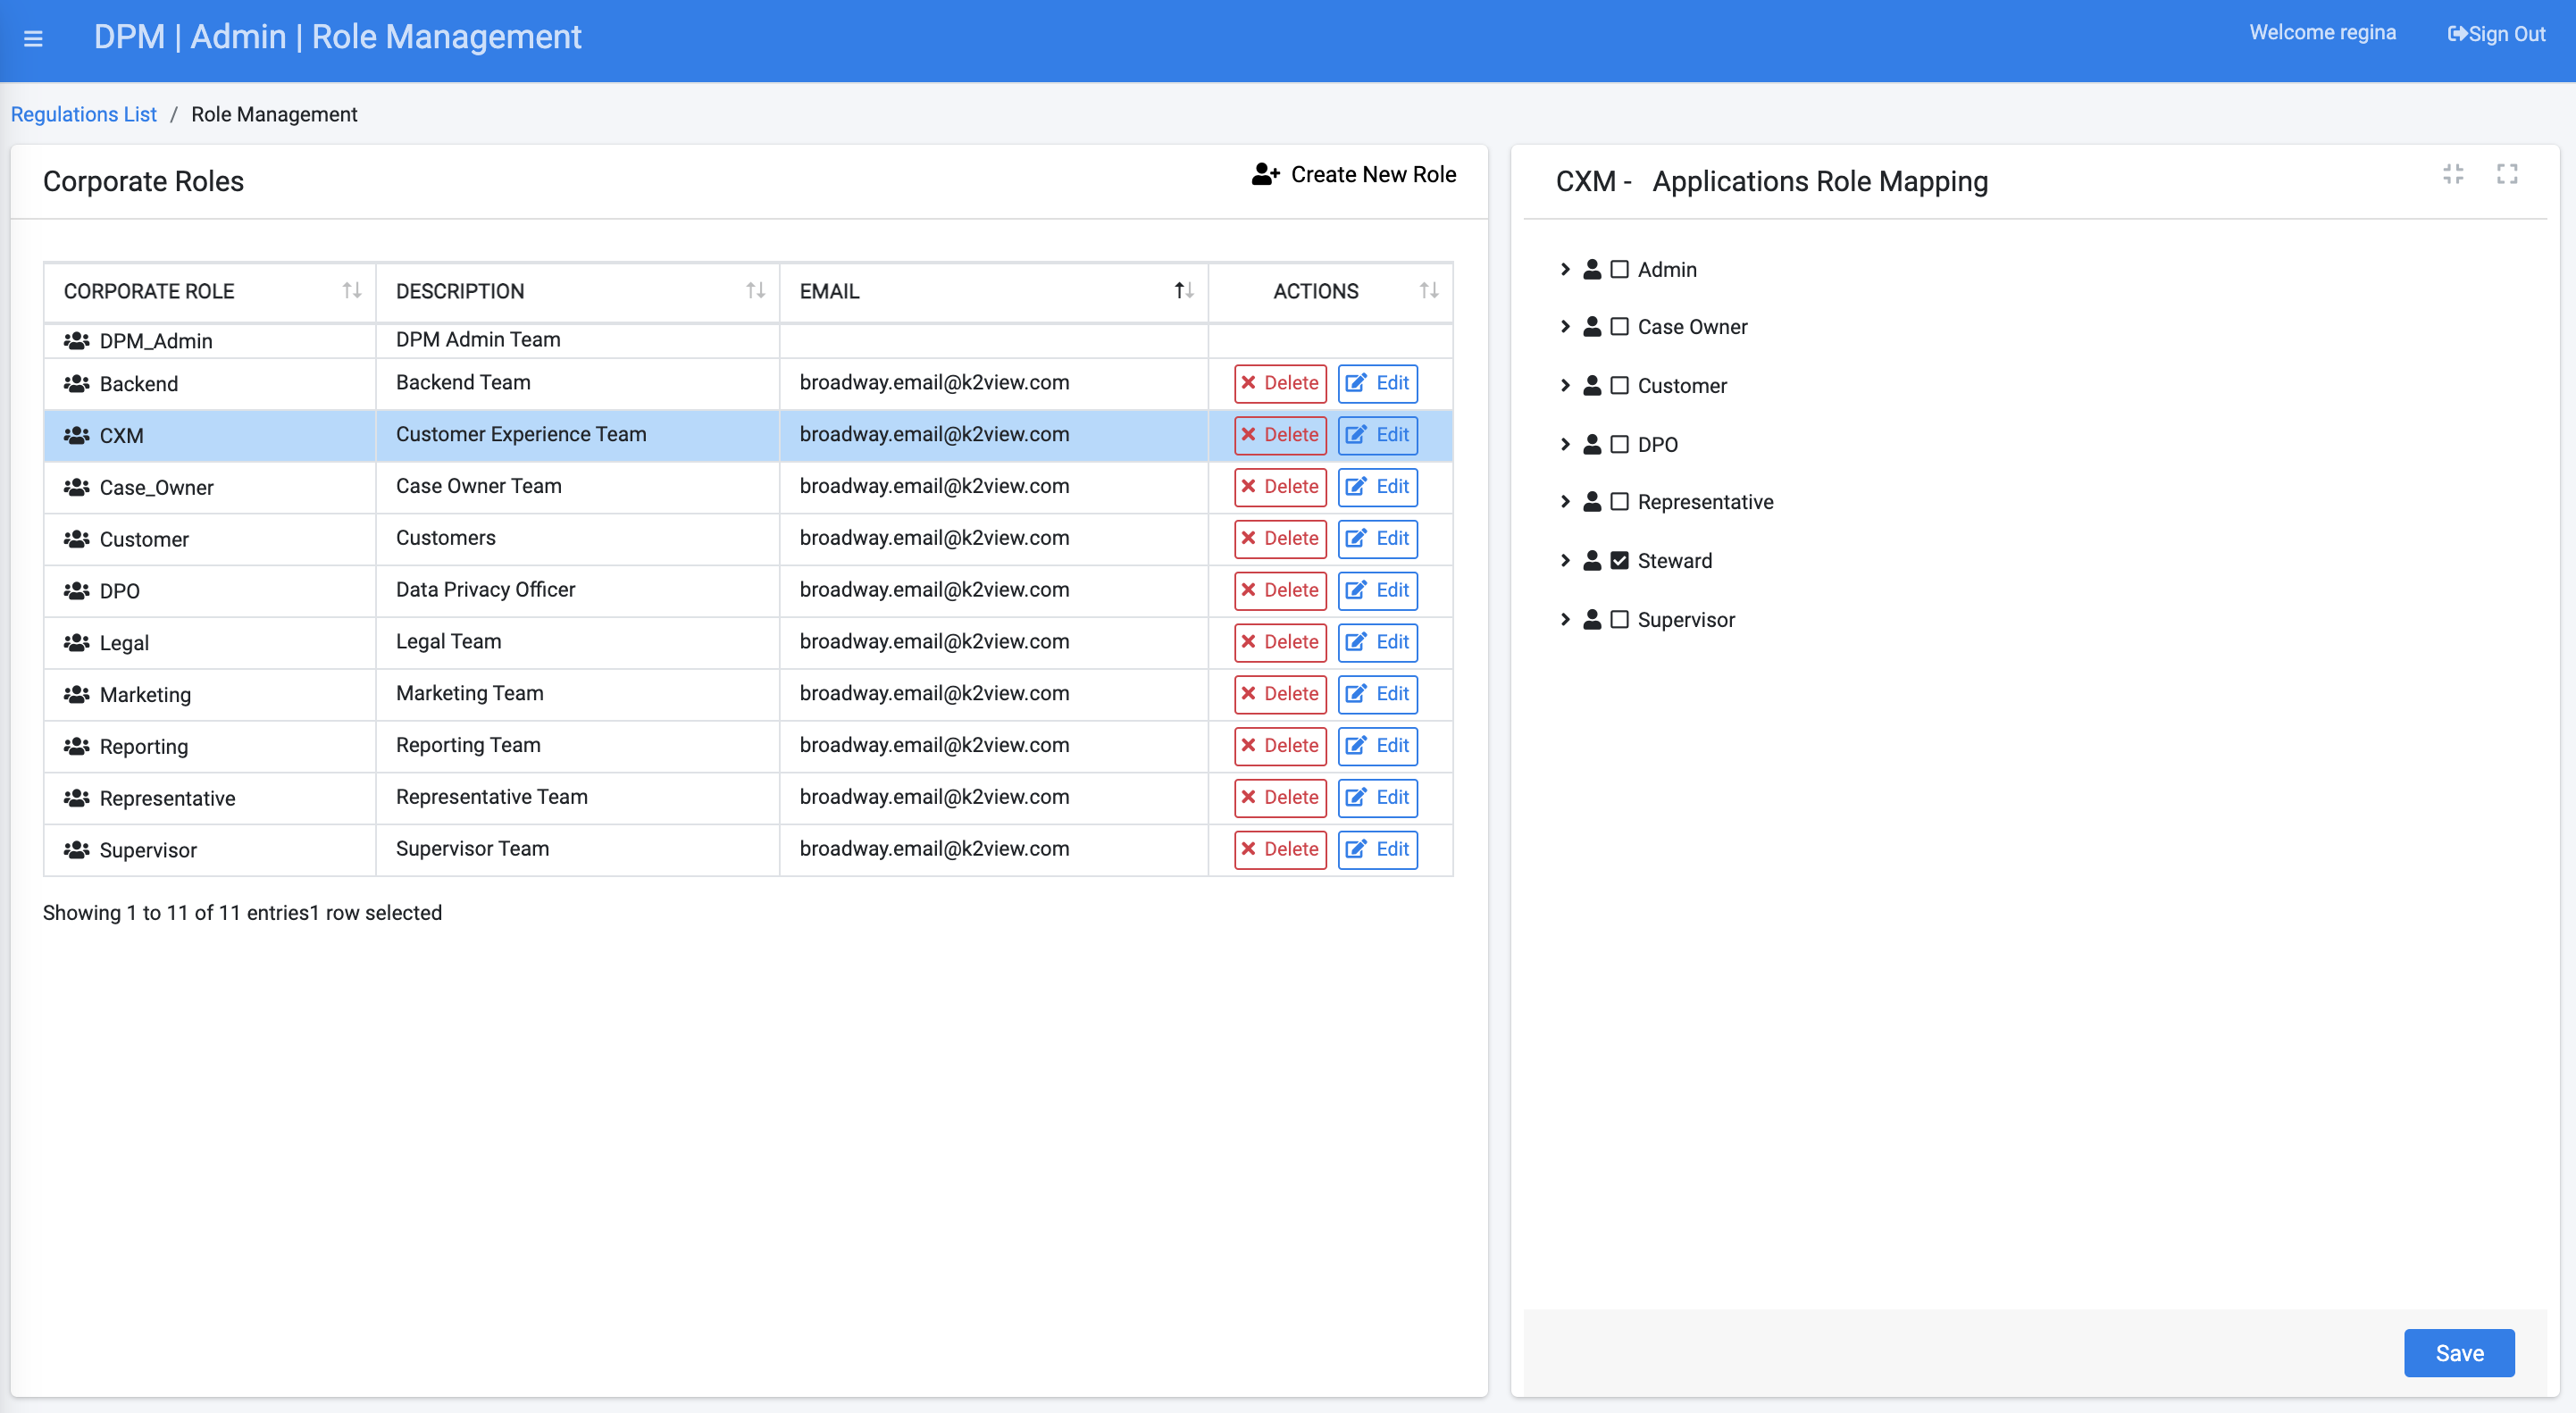
If a more detailed authorization definition is required, the Administrator can expand the options displayed under the selected Application Role, and specify with more details those actions the users from this corporate role can perform.
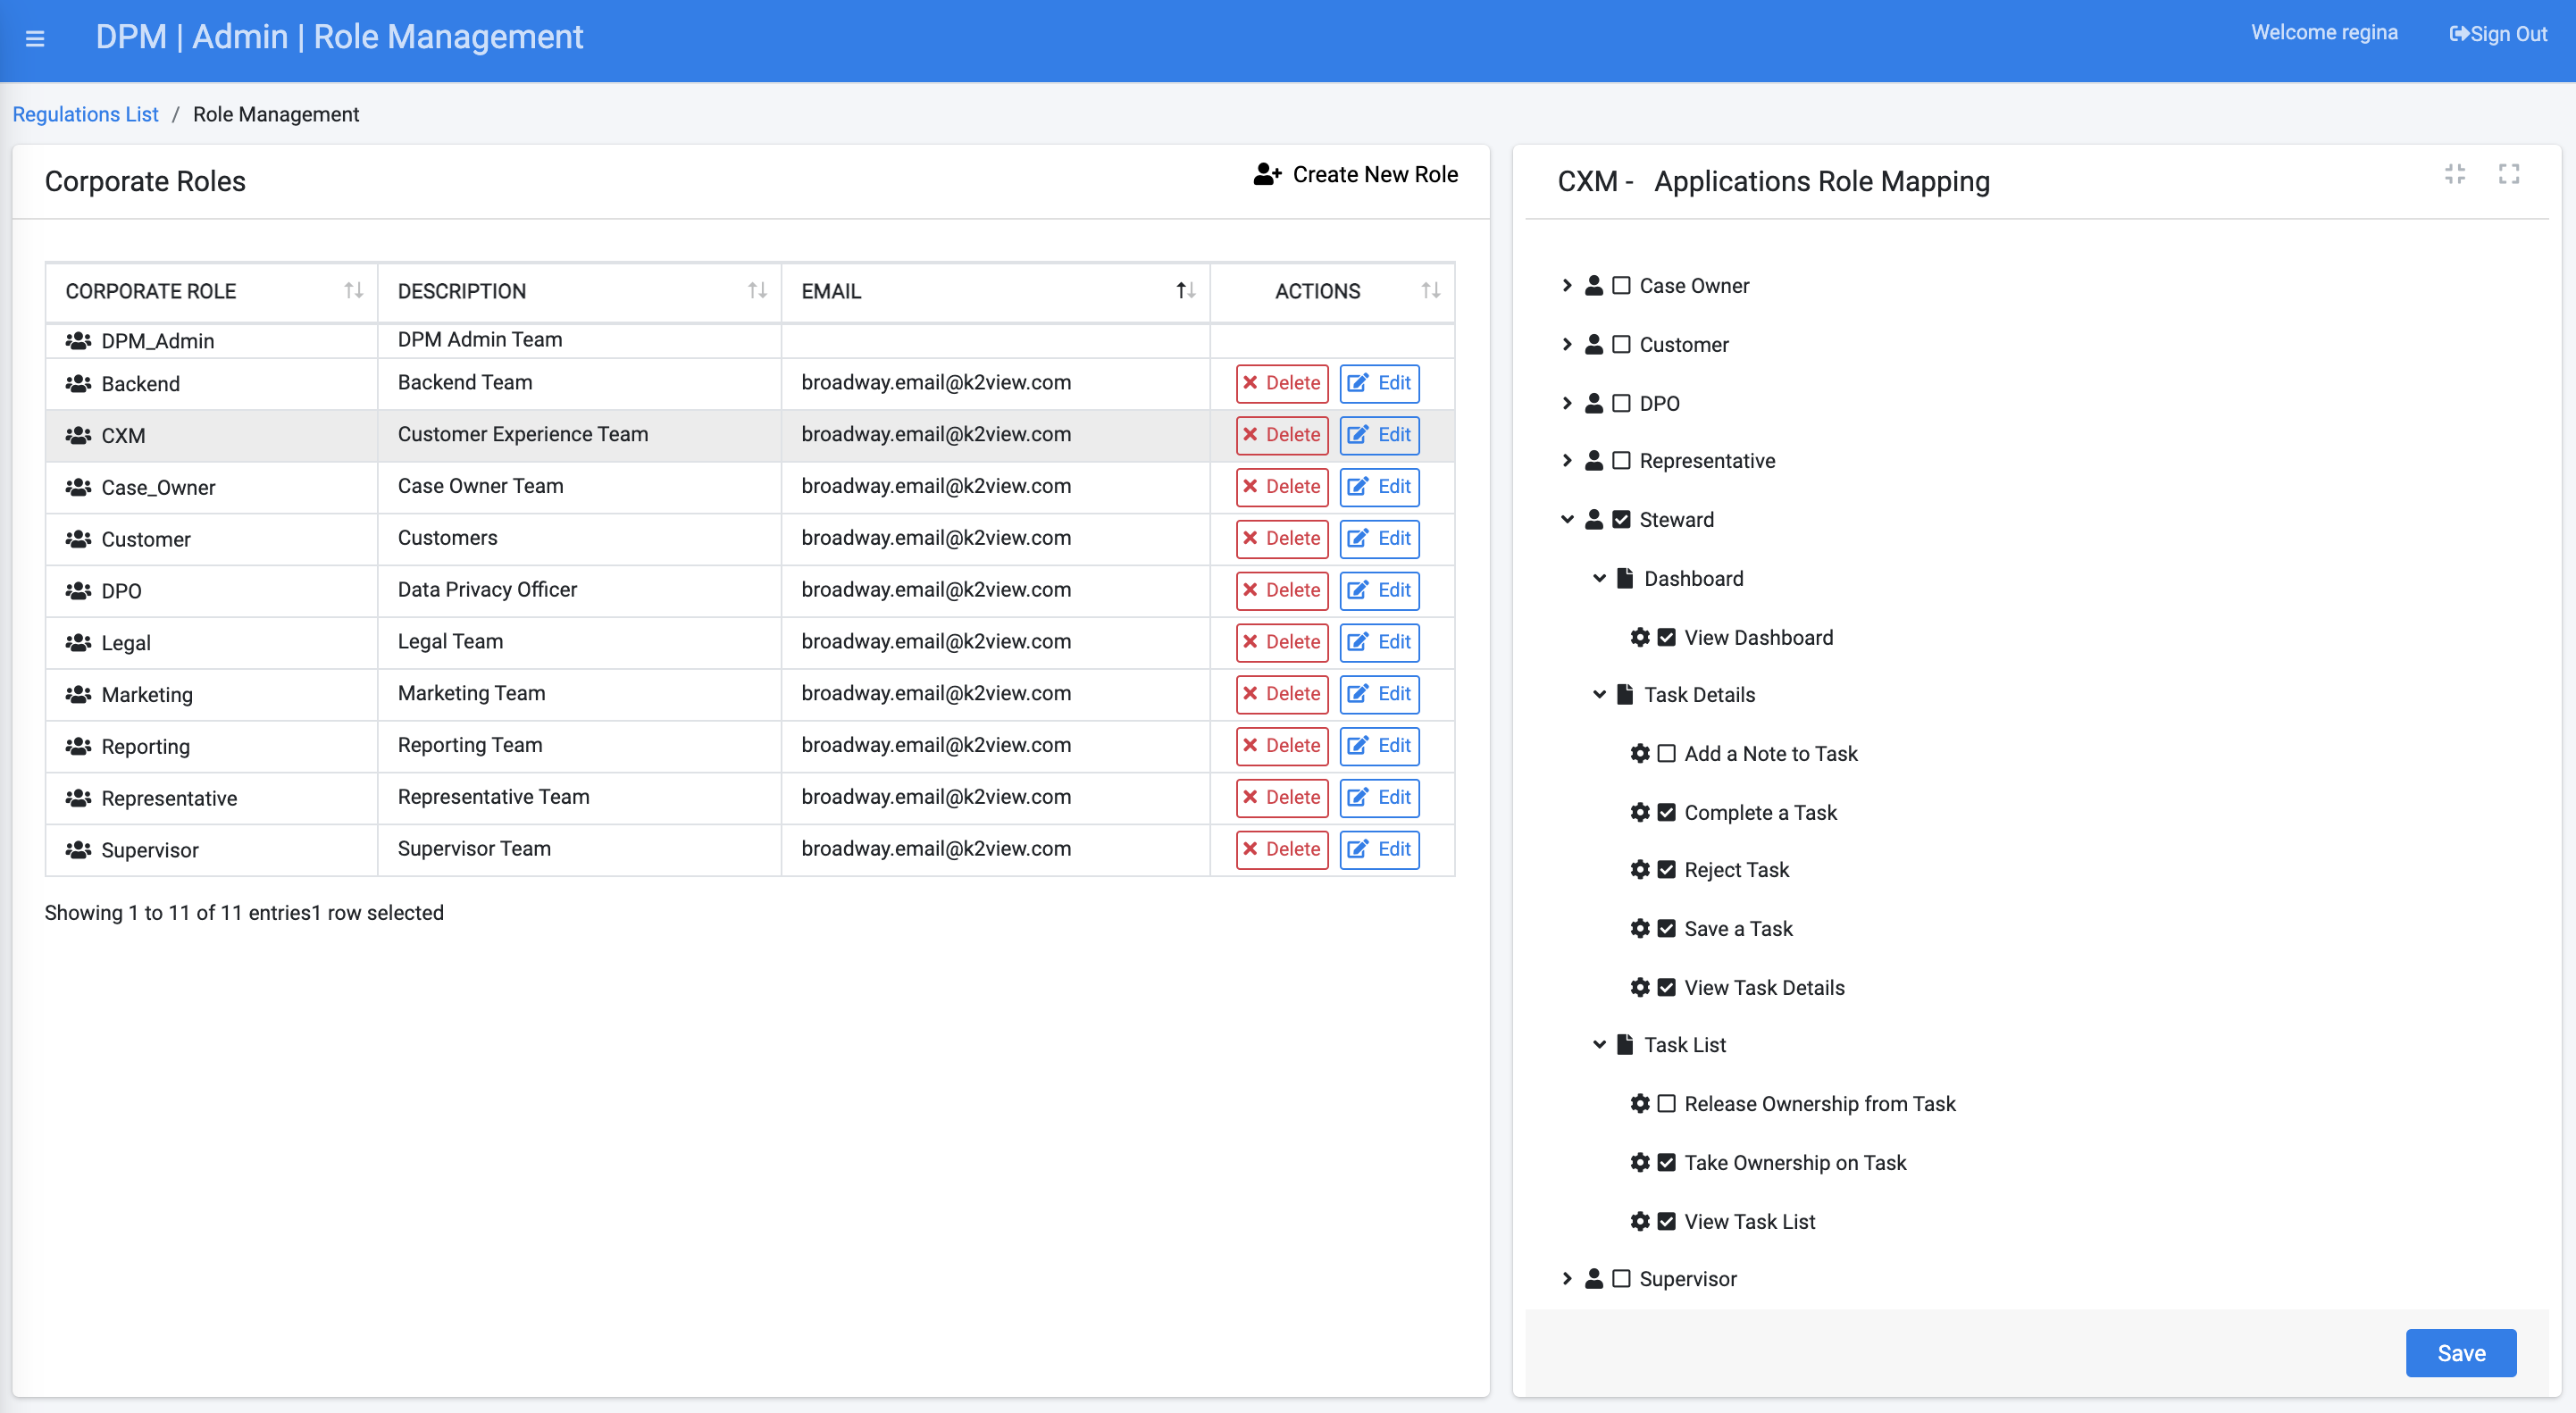
In the screen example above, the Corporate Role called “CXM” was assigned to the “Steward” Application Role but will not be allowed to add a note to a Task or Release Ownership of a Task. Each Corporate Role can have multiple Application Roles enabled. This means that the users assigned to such a Corporate Role will be able to perform actions or view information defined as part of all of the enabled Application Roles. The main menu on the left side of the screen is constructed based on the list of Application Roles enabled for the Corporate Roles to which the user belongs. See more details about the menu options presented to each user in the DPM Main Menu section following.
Add a new Corporate Role
To create a new Corporate Role, use the ![]() option at the top of the Role Management screen.
The “New Corporate Role” screen is displayed, as shown by the following.
option at the top of the Role Management screen.
The “New Corporate Role” screen is displayed, as shown by the following.
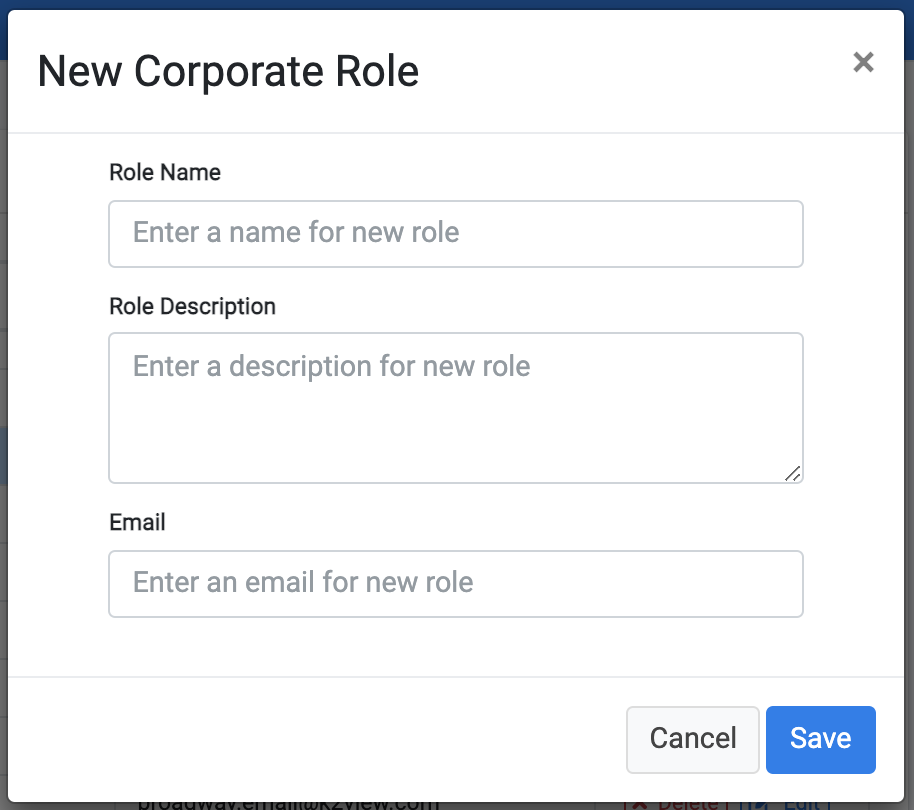
Once the user completes and saves the new Corporate Role, the new Role appears in the list of roles at the center of the screen.
Mapping Corporate Role to Application Role
The next step after creating a Corporate Role is to define the mapping to DPM Application Roles assigned to this Role, and under each Application Role, what screens and actions this Corporate Role can view or perform. To perform this mapping configuration, execute the actions described by the following steps.
Select the Corporate Role line on the central part of the screen. The right side of the screen then displays a tree of options that allow mapping to the application roles available to the group.
Define the configuration by checking or unchecking the box options from this tree.
Save the configuration using the “Save” button at the bottom of the screen.
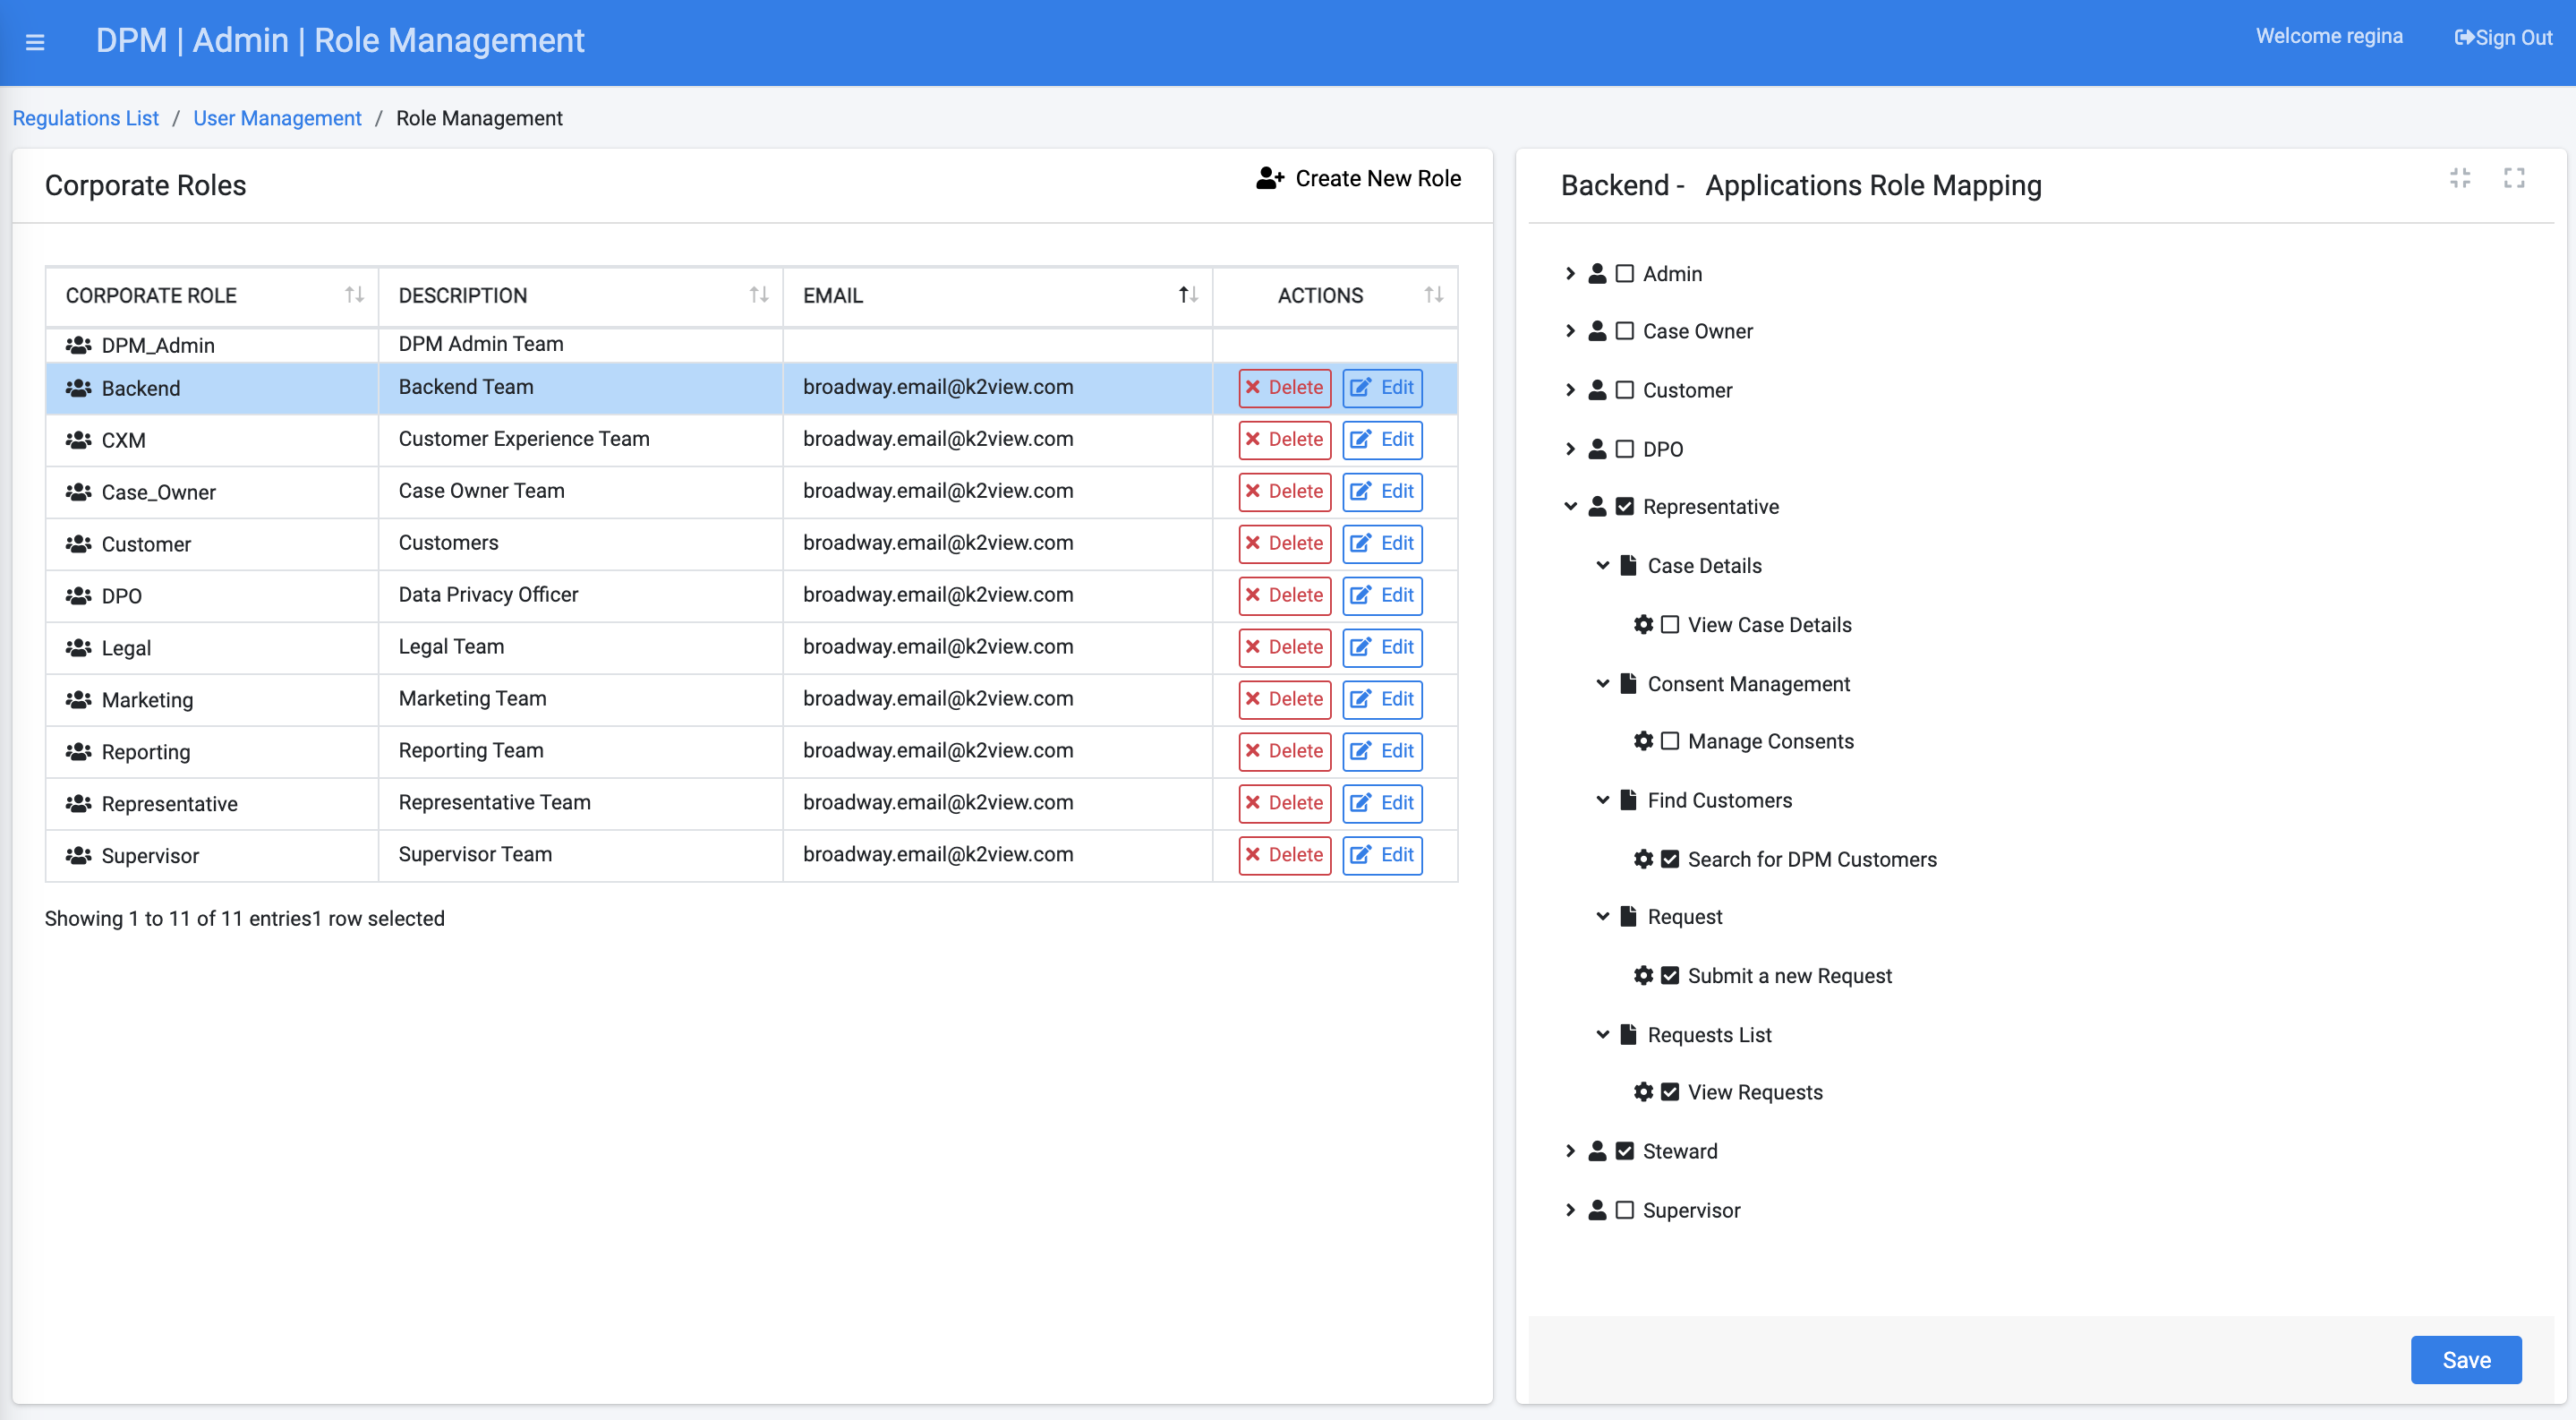
In the example above, the “Backend” Corporate Role is selected from the list of Corporate Roles. The right side of the screen presents the mapping of this “Backend” Corporate Role to the list of related Application Roles. At the highest level (first level of the tree), the checkboxes of “Representative” and “Steward” are checked. This means that the “Backend” Corporate Role is configured to have the functionality of the roles of Representative and Steward. A user belonging to the “Backend” Corporate Role has only those two options on the main menu at the left side of the screen (see the section Main Menu for more details). As observed, the permissions tree has multiple levels, which allow control of the Activities the user can or cannot perform. For example, from the preceding screen, the option “Manage Consent,” under the “Representative” branch, was unchecked. This means that though the users have the option to use Representative functionality, such as View the request list, or view a specific request, they will not be able to change consents on behalf of customers.
Edit or Delete a Corporate Role
Use the ![]() button to delete a Corporate Role. The deletion of the Role removes it from all users to which it was assigned.
button to delete a Corporate Role. The deletion of the Role removes it from all users to which it was assigned.
Use the ![]() button to edit the email address of a Corporate Role.
button to edit the email address of a Corporate Role.


Corporate Roles
Overview
Corporate Roles represent the roles defined by the company. Such roles represent the different groups that take part in the DPM processes. Corporate roles are fully configurable, and each corporation defines roles according to its own organizational structure.
Corporate roles are configured by the DPM Administrator by accessing the Role Management menu option.
The “Corporate Roles” screen displays the list of the corporate roles. When selecting one of the corporate roles, the right side of the screen displays the DPM Application Roles that are enabled for this Corporate Role. For example – A user belongs to the “Legal Fulfilment” group and is responsible to work on Tasks as part of the fulfilment process. Performing a Task is defined as part of the Steward Application Roles. So, for the user to perform a Task, the DPM Administrator acts to:
Create a Corporate Role to represent the Legal team, called “CXM,” as shown by the following example.
Mark this Role to perform the actions grouped under the “Steward” DPM Application Role (on the right side of the screen).
Assign the user to the corporate Role “CXM” (user management is detailed in the next section).
If a more detailed authorization definition is required, the Administrator can expand the options displayed under the selected Application Role, and specify with more details those actions the users from this corporate role can perform.
In the screen example above, the Corporate Role called “CXM” was assigned to the “Steward” Application Role but will not be allowed to add a note to a Task or Release Ownership of a Task. Each Corporate Role can have multiple Application Roles enabled. This means that the users assigned to such a Corporate Role will be able to perform actions or view information defined as part of all of the enabled Application Roles. The main menu on the left side of the screen is constructed based on the list of Application Roles enabled for the Corporate Roles to which the user belongs. See more details about the menu options presented to each user in the DPM Main Menu section following.
Add a new Corporate Role
To create a new Corporate Role, use the ![]() option at the top of the Role Management screen.
The “New Corporate Role” screen is displayed, as shown by the following.
option at the top of the Role Management screen.
The “New Corporate Role” screen is displayed, as shown by the following.
Once the user completes and saves the new Corporate Role, the new Role appears in the list of roles at the center of the screen.
Mapping Corporate Role to Application Role
The next step after creating a Corporate Role is to define the mapping to DPM Application Roles assigned to this Role, and under each Application Role, what screens and actions this Corporate Role can view or perform. To perform this mapping configuration, execute the actions described by the following steps.
Select the Corporate Role line on the central part of the screen. The right side of the screen then displays a tree of options that allow mapping to the application roles available to the group.
Define the configuration by checking or unchecking the box options from this tree.
Save the configuration using the “Save” button at the bottom of the screen.
In the example above, the “Backend” Corporate Role is selected from the list of Corporate Roles. The right side of the screen presents the mapping of this “Backend” Corporate Role to the list of related Application Roles. At the highest level (first level of the tree), the checkboxes of “Representative” and “Steward” are checked. This means that the “Backend” Corporate Role is configured to have the functionality of the roles of Representative and Steward. A user belonging to the “Backend” Corporate Role has only those two options on the main menu at the left side of the screen (see the section Main Menu for more details). As observed, the permissions tree has multiple levels, which allow control of the Activities the user can or cannot perform. For example, from the preceding screen, the option “Manage Consent,” under the “Representative” branch, was unchecked. This means that though the users have the option to use Representative functionality, such as View the request list, or view a specific request, they will not be able to change consents on behalf of customers.
Edit or Delete a Corporate Role
Use the ![]() button to delete a Corporate Role. The deletion of the Role removes it from all users to which it was assigned.
button to delete a Corporate Role. The deletion of the Role removes it from all users to which it was assigned.
Use the ![]() button to edit the email address of a Corporate Role.
button to edit the email address of a Corporate Role.
