Flow Level Actions
On the right-hand side of the Flow name are icons that respresent the available actions for that Flow. Each icon and its corresponding description are outlined in the following table.
![]()
At the upper-right corner of the Flow screen, the system shows general Flow information.

Each information item is described in the following table.
Add a Stage
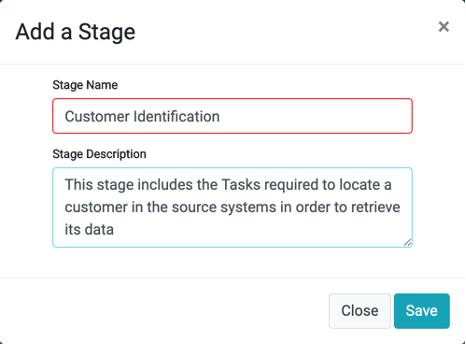
Use the New Stage ![]() icon on the left side of the Flow screen to add a new Stage. The user is prompted to define a Stage Name and Stage Description, as shown in the following figure and description table.
icon on the left side of the Flow screen to add a new Stage. The user is prompted to define a Stage Name and Stage Description, as shown in the following figure and description table.

|
Property |
M/O |
Description |
|
Stage Name |
M |
The name of this Stage. |
|
Stage Description |
O |
The Stage description. |
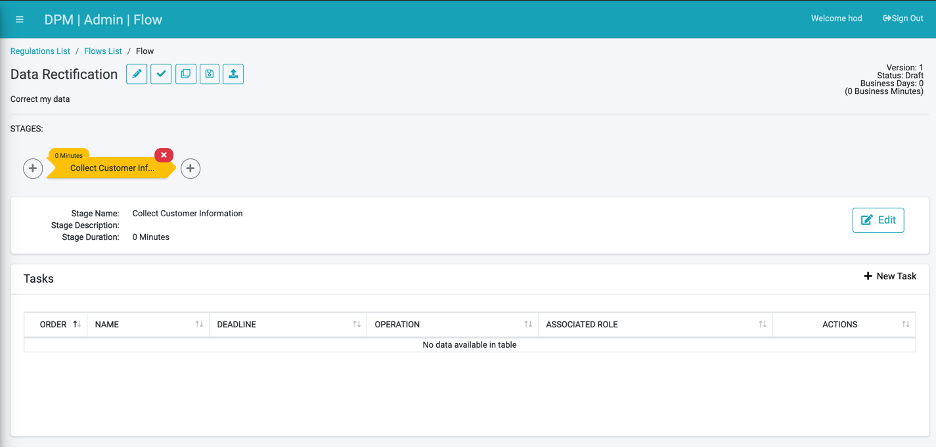
Save the new Stage to open the following screen and define the Stage Tasks.

While the Status is marked as a Draft (not Completed), additional Stages can be added or updated by adding or modifying Tasks.
Flow Level Actions
On the right-hand side of the Flow name are icons that respresent the available actions for that Flow. Each icon and its corresponding description are outlined in the following table.
![]()
At the upper-right corner of the Flow screen, the system shows general Flow information.

Each information item is described in the following table.
Add a Stage
Use the New Stage ![]() icon on the left side of the Flow screen to add a new Stage. The user is prompted to define a Stage Name and Stage Description, as shown in the following figure and description table.
icon on the left side of the Flow screen to add a new Stage. The user is prompted to define a Stage Name and Stage Description, as shown in the following figure and description table.

|
Property |
M/O |
Description |
|
Stage Name |
M |
The name of this Stage. |
|
Stage Description |
O |
The Stage description. |
Save the new Stage to open the following screen and define the Stage Tasks.

While the Status is marked as a Draft (not Completed), additional Stages can be added or updated by adding or modifying Tasks.


