

Okta SAML Setup Guide
This article describes the setup and integration steps to connect your Single-Sign-On account at Okta to Fabric and get the benefits of easy sign-in, along with authentication and authorization control via your admin tools.
Prerequisite Requirements
- Admin access to Okta.
- Access to Fabric configuration settings. For more information about SAML configuration at Fabric please see here.
Configuration instructions: At Okta
Select Fabric from Okta App Gallery
Log into the Okta Admin console as an Admin.
In the Admin Console, go to Applications > Applications via the left navigation bar.
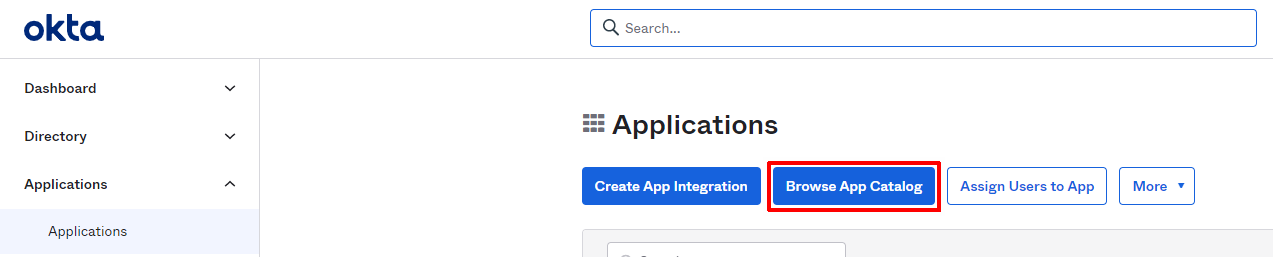
At the Applications page, click ‘Browse App Catalog’ .
|
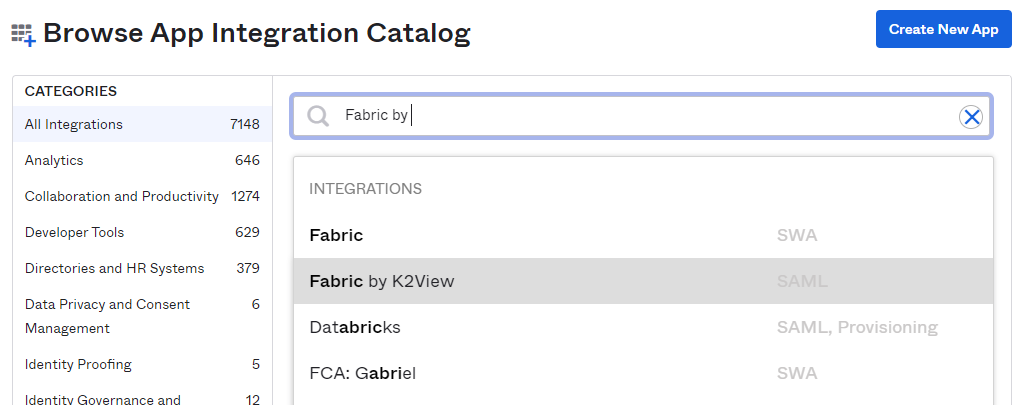
At the Browse App Integration Catalog page, search for "Fabric by K2View" via the search box and select it.
|
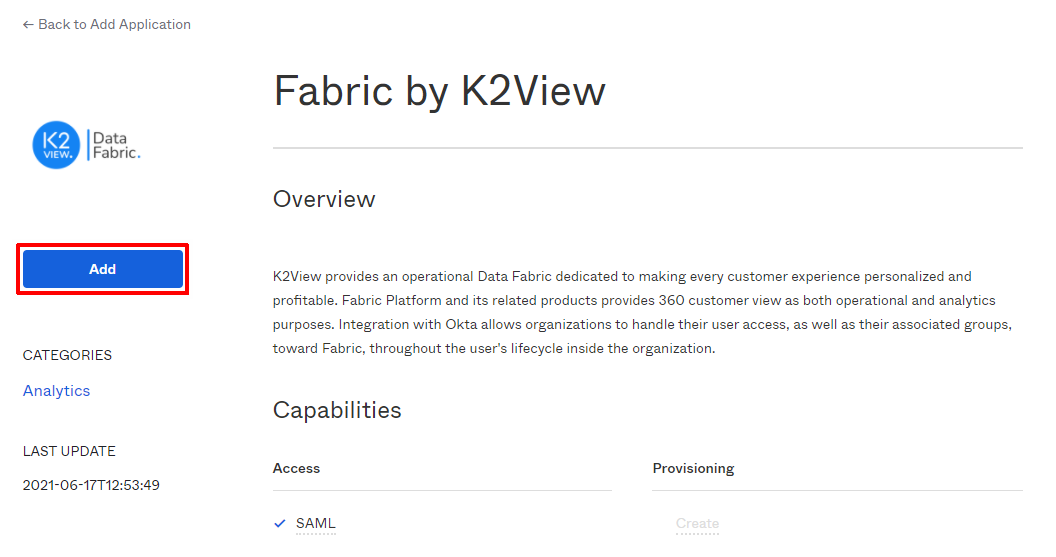
On the Fabric by K2View app page, click 'Add'.
|
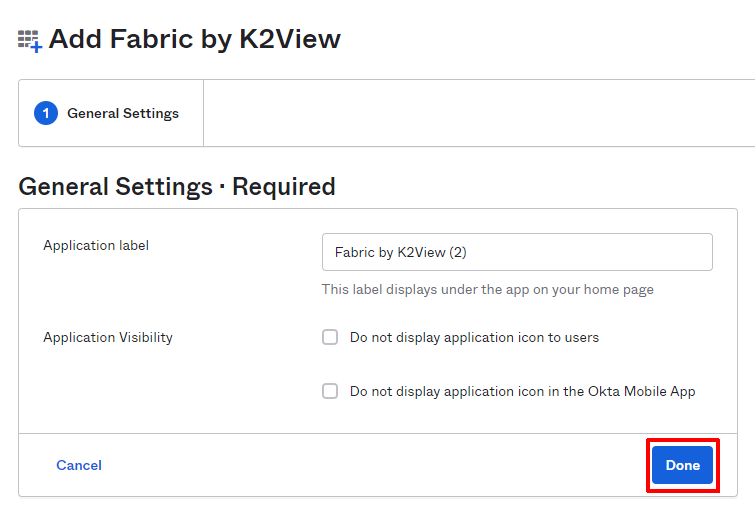
On next page, click 'Done'. The app is created and is ready to configure the specific deployment setup.
 |
Setup Configuration Settings
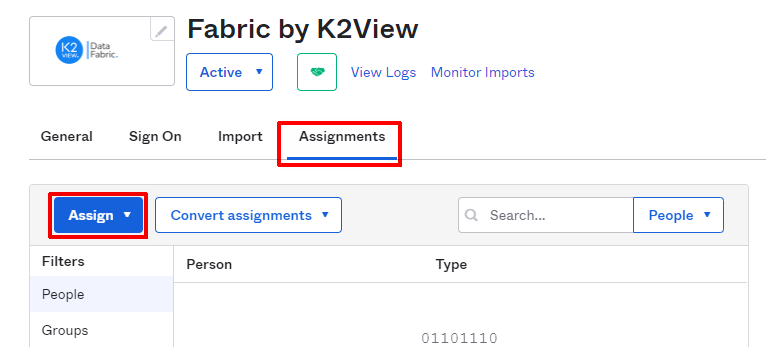
Assign users or groups to the application, via the Assignments tab, by using the 'Assign' button. Assigning groups will assign the users associated with the groups.
 |
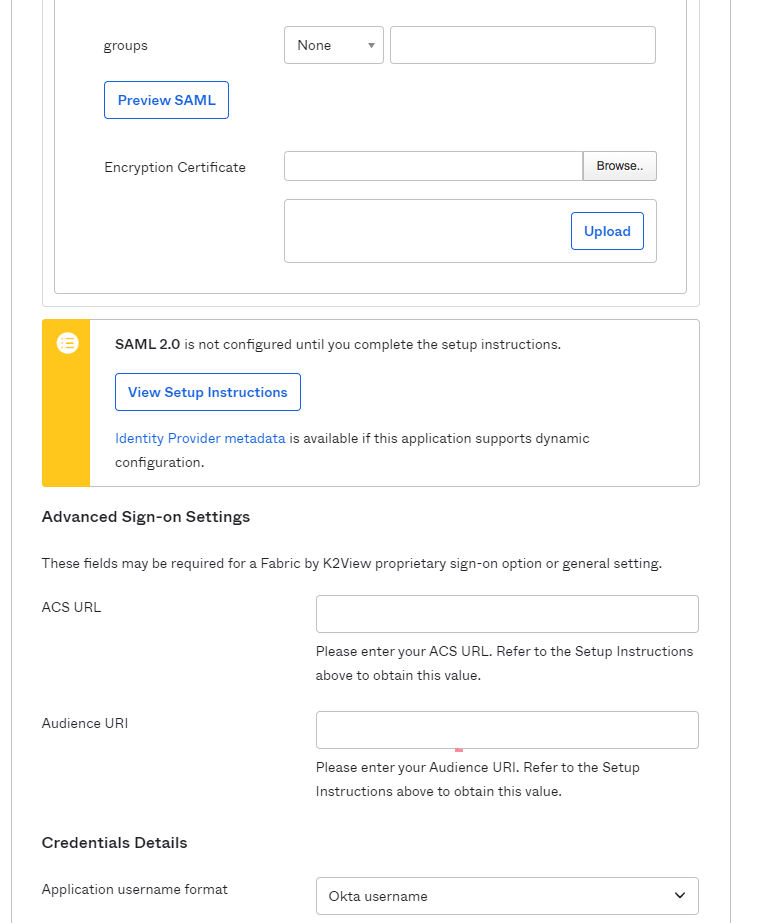
Complete the SAML SSO configuration, via the Sign On tab, by clicking on 'Edit' and filling in the relevant fields. Once done - click 'Save'.
groups - at the select list choose "Matches regex" and fill ".*" in the form field.
Encryption Certificate - browse to the public key certificate used to encrypt the SAML assertion, as exported from Fabric. Then click on 'Upload'. See more here about the Fabric certificate file.
ACS URL - as provided by Fabric team. It should be similar to this pattern: "https://< fabric-external-domain-name >:< port >/api/authenticate".
Audience URI (SP Entity ID) - the intended audience of the SAML assertion. This is the Fabric Entity ID. It should be similar to this pattern: "https://< fabric-external-domain-name >".
Application username format - at the select list choose "Email".
Collect the IDP properties to be set at Fabric configuration
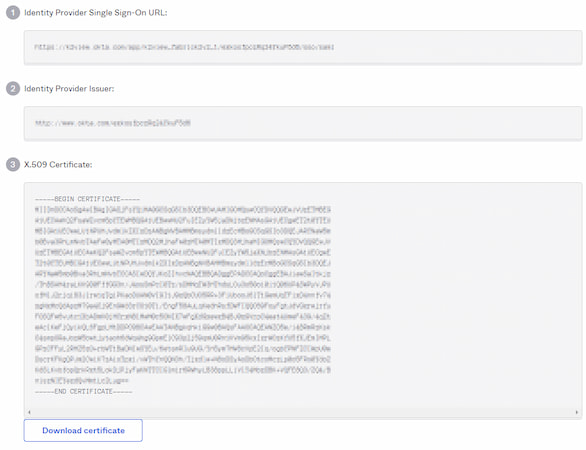
At the "Sign On" tab, click on "View Setup Instructions".
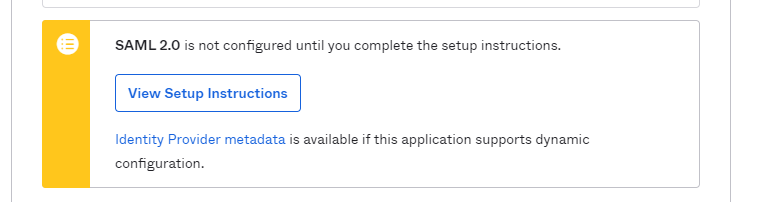 |
A new browser tab will open with the information that should be copied to Fabric configuration (IDP URL and IDP issuer/entity ID) and the certificate key to be uploaded into Fabric, for signing the authentication requests.
 |

Okta SAML Setup Guide
This article describes the setup and integration steps to connect your Single-Sign-On account at Okta to Fabric and get the benefits of easy sign-in, along with authentication and authorization control via your admin tools.
Prerequisite Requirements
- Admin access to Okta.
- Access to Fabric configuration settings. For more information about SAML configuration at Fabric please see here.
Configuration instructions: At Okta
Select Fabric from Okta App Gallery
Log into the Okta Admin console as an Admin.
In the Admin Console, go to Applications > Applications via the left navigation bar.
At the Applications page, click ‘Browse App Catalog’ .
|
|
At the Browse App Integration Catalog page, search for "Fabric by K2View" via the search box and select it.
|
|
On the Fabric by K2View app page, click 'Add'.
|
|
On next page, click 'Done'. The app is created and is ready to configure the specific deployment setup.
| |
Setup Configuration Settings
Assign users or groups to the application, via the Assignments tab, by using the 'Assign' button. Assigning groups will assign the users associated with the groups.
| |
Complete the SAML SSO configuration, via the Sign On tab, by clicking on 'Edit' and filling in the relevant fields. Once done - click 'Save'.
groups - at the select list choose "Matches regex" and fill ".*" in the form field.
Encryption Certificate - browse to the public key certificate used to encrypt the SAML assertion, as exported from Fabric. Then click on 'Upload'. See more here about the Fabric certificate file.
ACS URL - as provided by Fabric team. It should be similar to this pattern: "https://< fabric-external-domain-name >:< port >/api/authenticate".
Audience URI (SP Entity ID) - the intended audience of the SAML assertion. This is the Fabric Entity ID. It should be similar to this pattern: "https://< fabric-external-domain-name >".
Application username format - at the select list choose "Email".
Collect the IDP properties to be set at Fabric configuration
At the "Sign On" tab, click on "View Setup Instructions".
| |
A new browser tab will open with the information that should be copied to Fabric configuration (IDP URL and IDP issuer/entity ID) and the certificate key to be uploaded into Fabric, for signing the authentication requests.
| |
