
Create a New Consent
The first step in consent management is to configure what are the consent topics that should be obtained from your customers.
To configure a new Consent Topic, click the ![]() button at the top-right of the Consent Management screen.
button at the top-right of the Consent Management screen.
The New Consent dialog box displays.
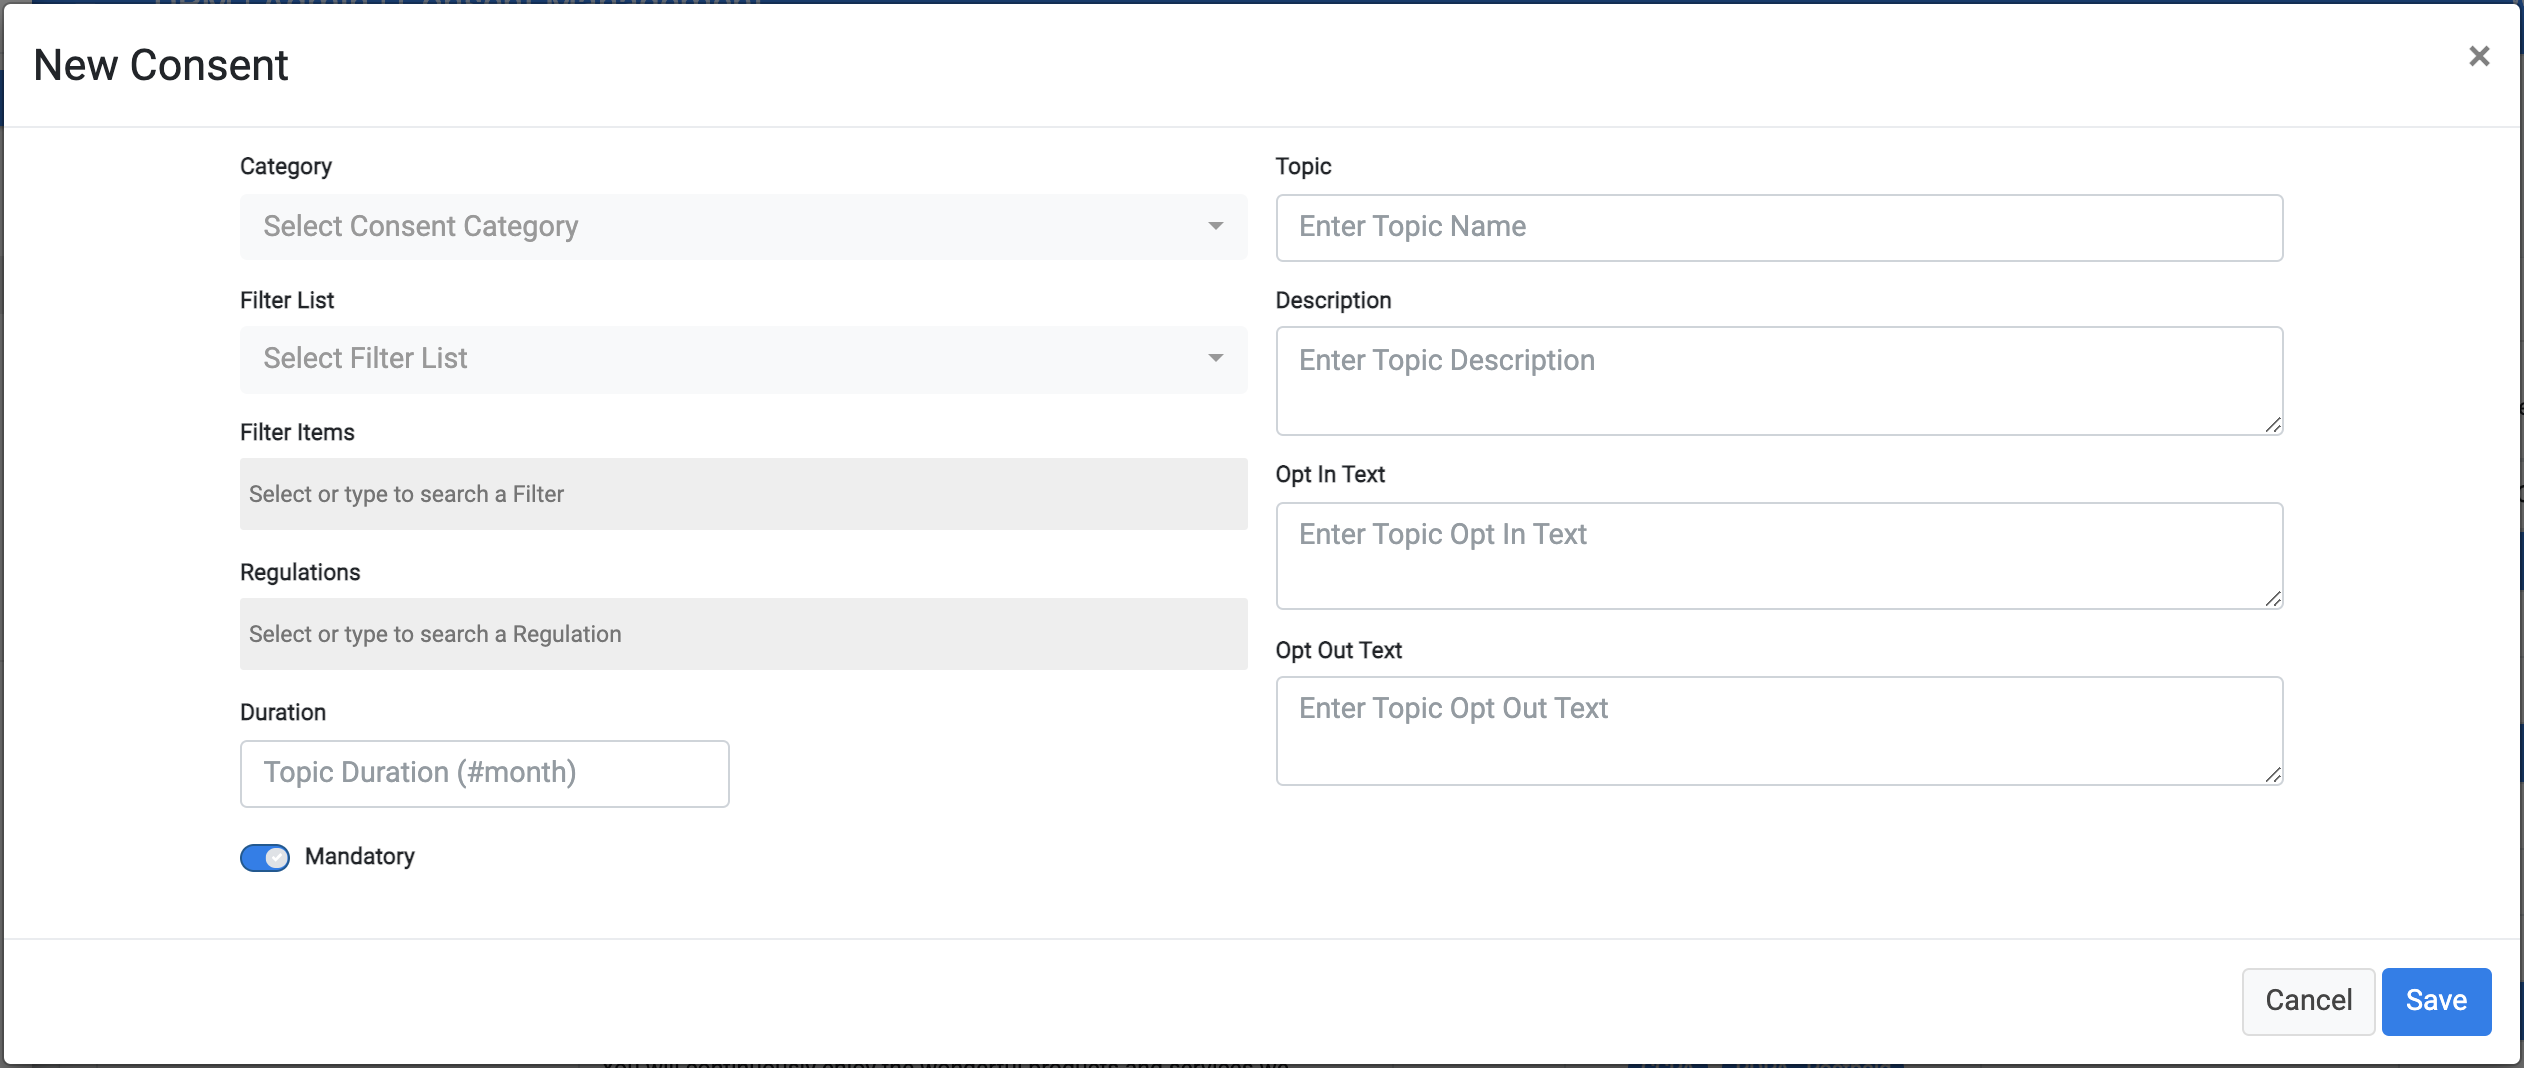
In the New Consent Topic popup, populate the following fields:
- Select a Category. Categories are used for grouping consent topics. This field lets the user classify the new consent under an existing Category or select New Category to configure a new one. For this demonstration, select Marketing.
- Enter the Topic name.
- Enter the new consent Topic Description.
- Enter the Opt-In Text. This is the text that displays to the customer, explaining the benefits of opting in to this consent.
- Enter the Opt-Out Text. This is the text that displays to the customer if they decline their consent. It could explain how they may be impacted by opting-out, as well beneficial information that they won’t see as a result.
- in the Filter List field you can choose one of the existing Custom List as the base for the filter that will be used for this consent. This will allow you to restrict this consent so that it appears only for customers that meet the criteria of specific user categories. You may also create a new list by accessing the Custom List menu option.
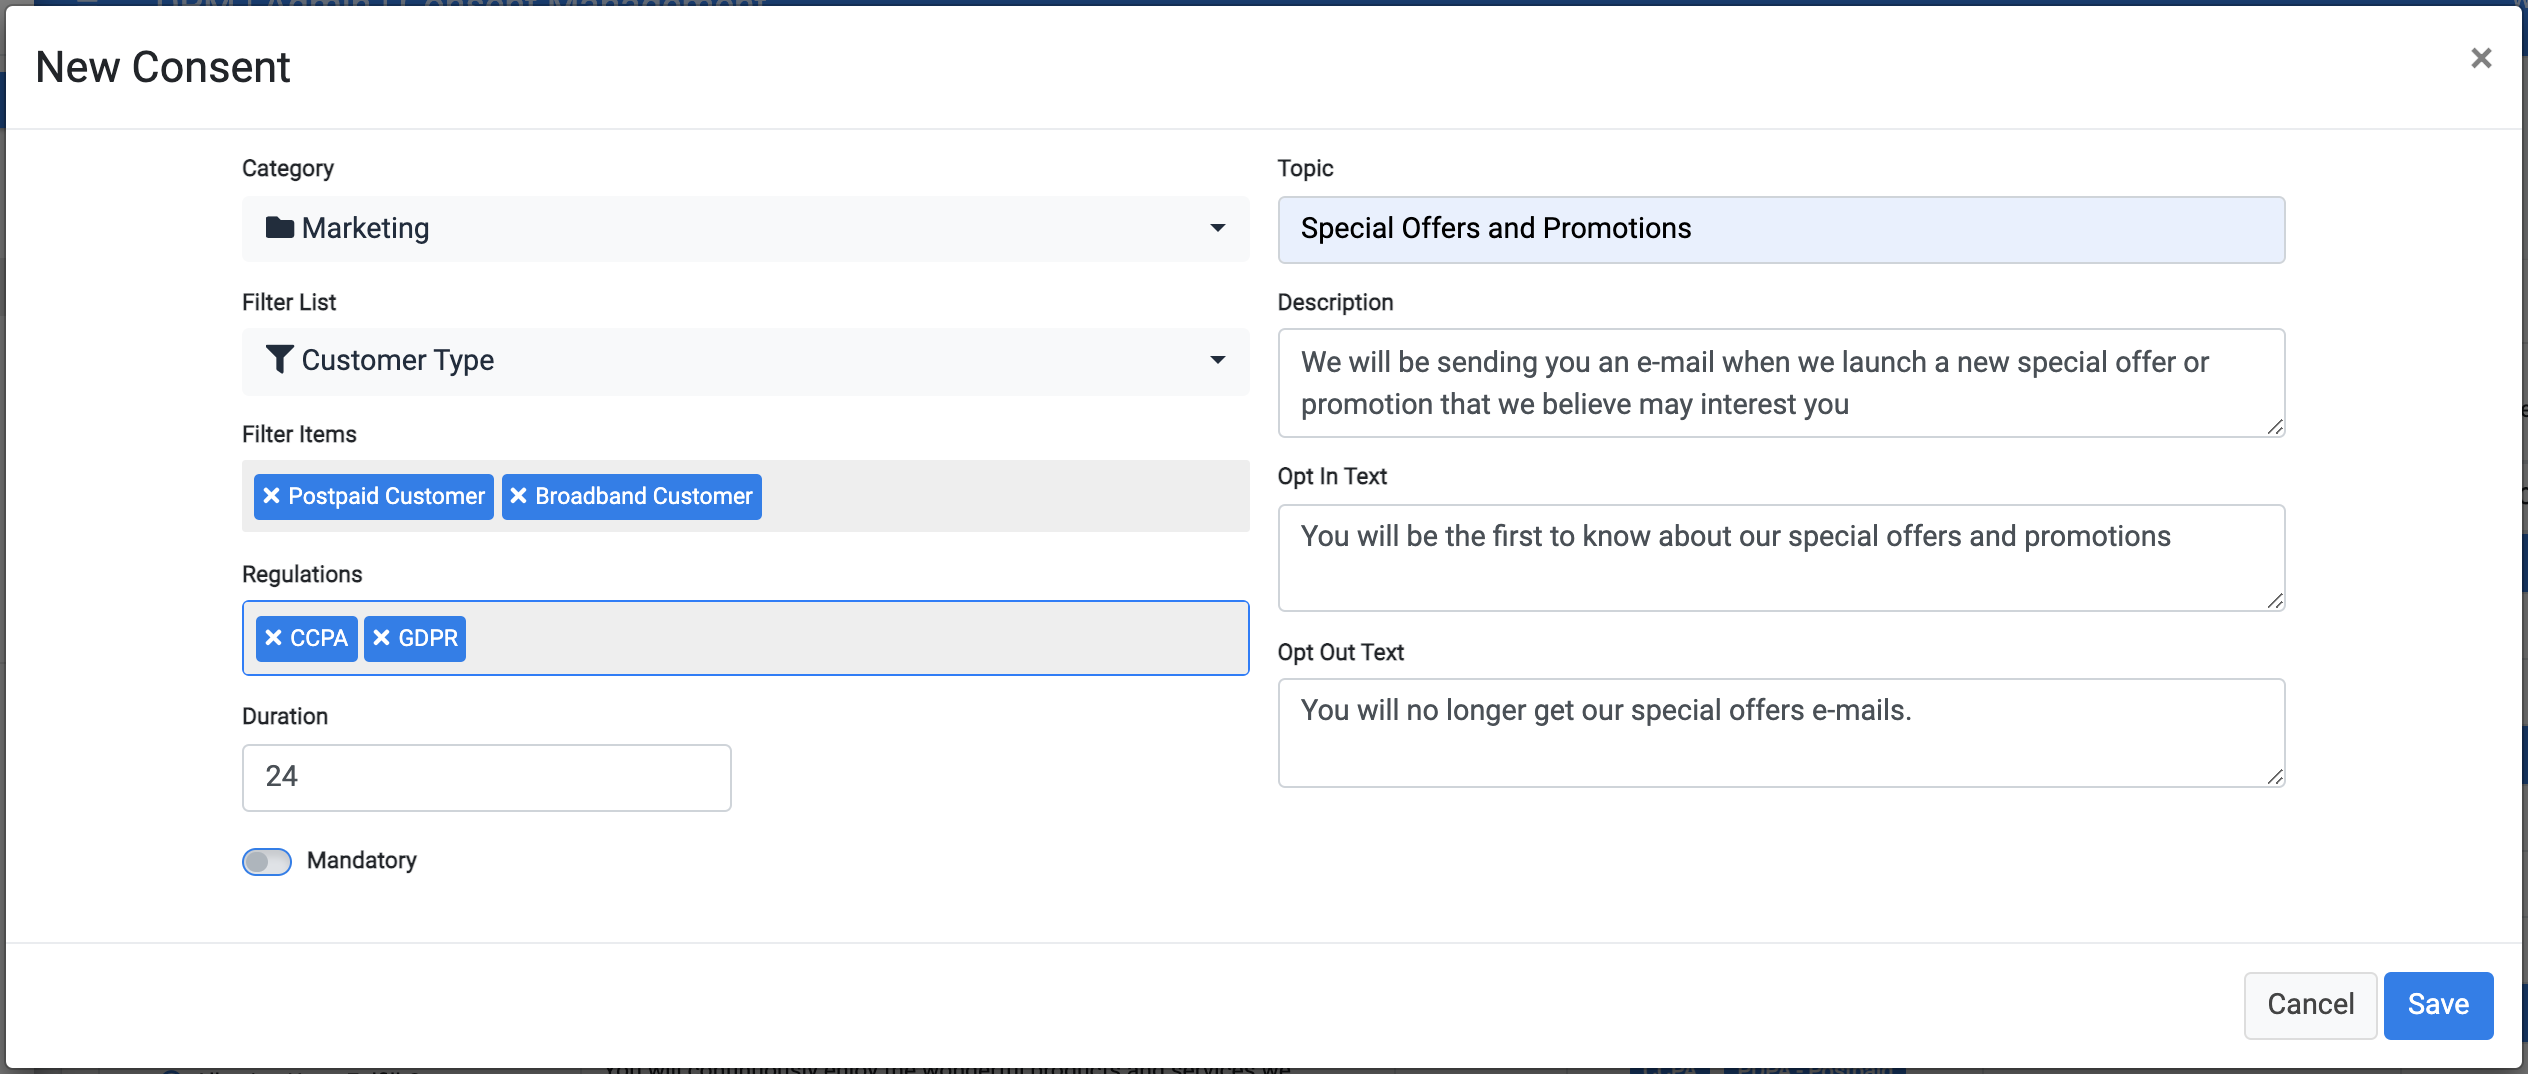
- If you have selected a Filter List in the field above, you can now use the Filter Items field to specify the values from this list that are relevant for this consent. For example, we selected the Filter List to be the "Customer Type" list, and specified that this consent is relevant for Postpaid and Broadband customers.
- Define the list of Regulations that this consent is linked to by selecting the relevant regulations from the dropdown list. The list of regulations that displays in this dropdown is defined in the Regulation List option on the Admin menu. Multiple regulations can be selected. For this example, we selected the “CCPA” and “GDPR” Regulations.
- Define the Duration that the consent is considered valid at the customer level. For every customer, the consent takes effect the moment of opting-in, and then for the duration that is specified in this field. The number you enter represents the number of months the consent is valid. In this example, we entered “24” to represent 24 months.
- Set the Mandatory indicator to off if the user is allowed to switch this consent on and off.
Review your entries as needed, and then click ![]() .
.
The New Consent displays in the Consents table. The rows are separated by Category. Since we chose “Marketing” Category in the New Consent, it displays under the Marketing Category, along with all other Consents of the same Category.

Click ![]() , located at the top-right corner of the screen.
, located at the top-right corner of the screen.

Create a New Consent
The first step in consent management is to configure what are the consent topics that should be obtained from your customers.
To configure a new Consent Topic, click the ![]() button at the top-right of the Consent Management screen.
button at the top-right of the Consent Management screen.
The New Consent dialog box displays.
In the New Consent Topic popup, populate the following fields:
- Select a Category. Categories are used for grouping consent topics. This field lets the user classify the new consent under an existing Category or select New Category to configure a new one. For this demonstration, select Marketing.
- Enter the Topic name.
- Enter the new consent Topic Description.
- Enter the Opt-In Text. This is the text that displays to the customer, explaining the benefits of opting in to this consent.
- Enter the Opt-Out Text. This is the text that displays to the customer if they decline their consent. It could explain how they may be impacted by opting-out, as well beneficial information that they won’t see as a result.
- in the Filter List field you can choose one of the existing Custom List as the base for the filter that will be used for this consent. This will allow you to restrict this consent so that it appears only for customers that meet the criteria of specific user categories. You may also create a new list by accessing the Custom List menu option.
- If you have selected a Filter List in the field above, you can now use the Filter Items field to specify the values from this list that are relevant for this consent. For example, we selected the Filter List to be the "Customer Type" list, and specified that this consent is relevant for Postpaid and Broadband customers.
- Define the list of Regulations that this consent is linked to by selecting the relevant regulations from the dropdown list. The list of regulations that displays in this dropdown is defined in the Regulation List option on the Admin menu. Multiple regulations can be selected. For this example, we selected the “CCPA” and “GDPR” Regulations.
- Define the Duration that the consent is considered valid at the customer level. For every customer, the consent takes effect the moment of opting-in, and then for the duration that is specified in this field. The number you enter represents the number of months the consent is valid. In this example, we entered “24” to represent 24 months.
- Set the Mandatory indicator to off if the user is allowed to switch this consent on and off.
Review your entries as needed, and then click ![]() .
.
The New Consent displays in the Consents table. The rows are separated by Category. Since we chose “Marketing” Category in the New Consent, it displays under the Marketing Category, along with all other Consents of the same Category.
Click ![]() , located at the top-right corner of the screen.
, located at the top-right corner of the screen.
