Navigating an LU Schema
When creating or editing a Logical Unit schema the following options are used to navigate, configure and display information:
- Diagram Outline tab, a representation of the LU schema table’s list.
- Navigation pane, an overview of the LU schema located in the right corner of the working area.
- LU working area, where view options can be set.
Click for more information about the Diagram Outline and Toolbars.
How Do I Use the Diagram Outline?
The Diagram Outline displays an overview of the LU structure and can be used to search for a subset of tables included in the Schema.
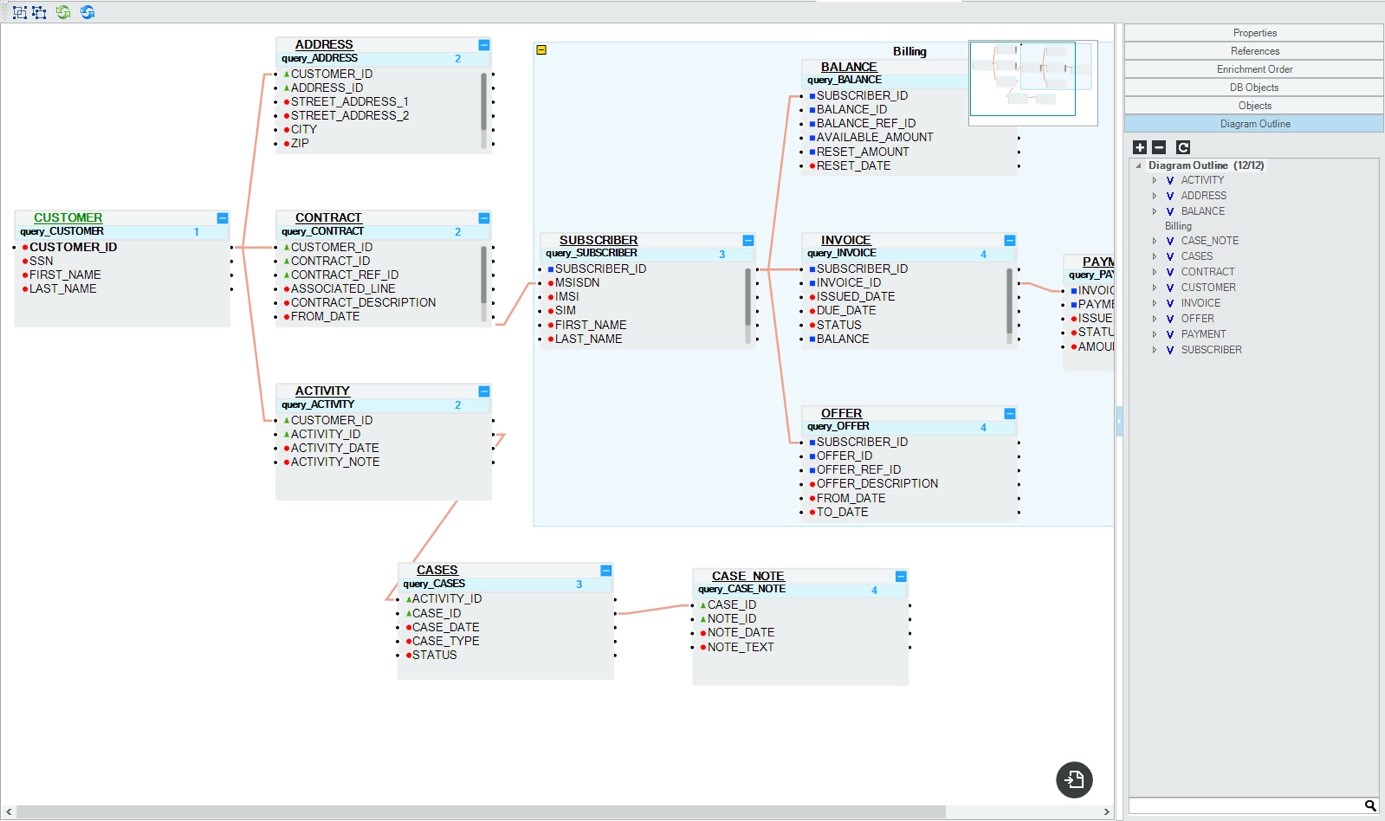
To search for an LU table in an LU schema:
- Open the LU Schema window.
- Click the Diagram Outline tab in the right panel.
- In the Search field, type the name of the table or column and then click it in the displayed list. The table or column is highlighted with a green border.
What is the Navigation Pane?
The Navigation pane in the right corner of an LU schema is used to move between the different areas of a Schema. This is useful when looking at large Logical Units with many tables or hierarchy levels.
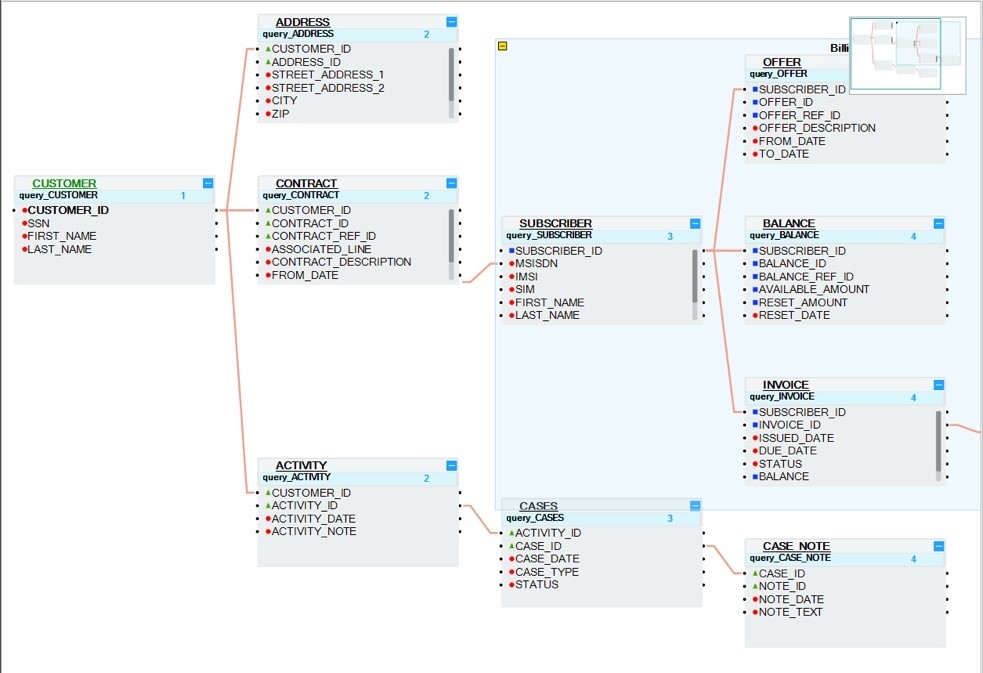
What are the LU Working Area View Options?
LU Tables relationship options:\ In the LU working area, right click an LU table object to display a context menu with the following actions:
|
set as: root |
Sets the table object as the root of this LU. |
|
show only Predecessor nodes |
Shows only objects and links that are predecessors of this object / field. |
|
show only successor nodes |
Shows only objects and links that are successors of this object / field. |
|
show only connected nodes |
Shows all objects and links connected to this object / field. |
|
show all nodes |
Shows all objects and links in this table. |
|
clear input links |
Clears all input links from objects in the Schema. |
|
clear output links |
Clears all output links from this LU table to its children Table Populations. |
|
clear all links |
Clears all input and output links in the LU tables. |
|
show data |
When clicked, a Query Builder window opens automatically in the newest LU file. |
For Example
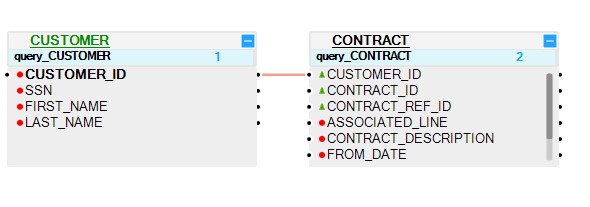
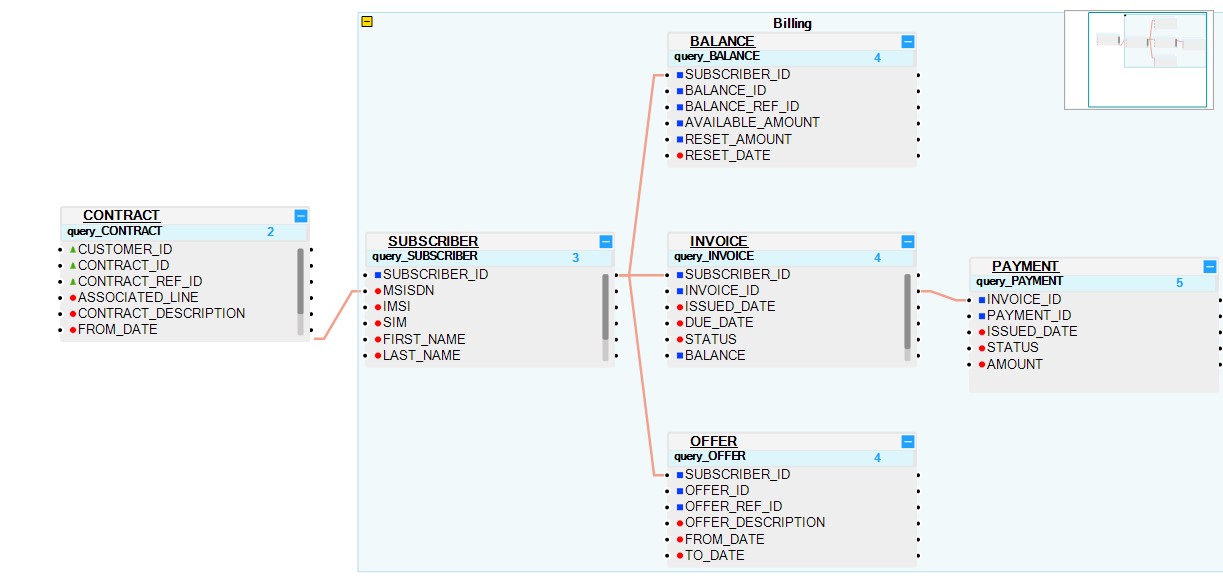
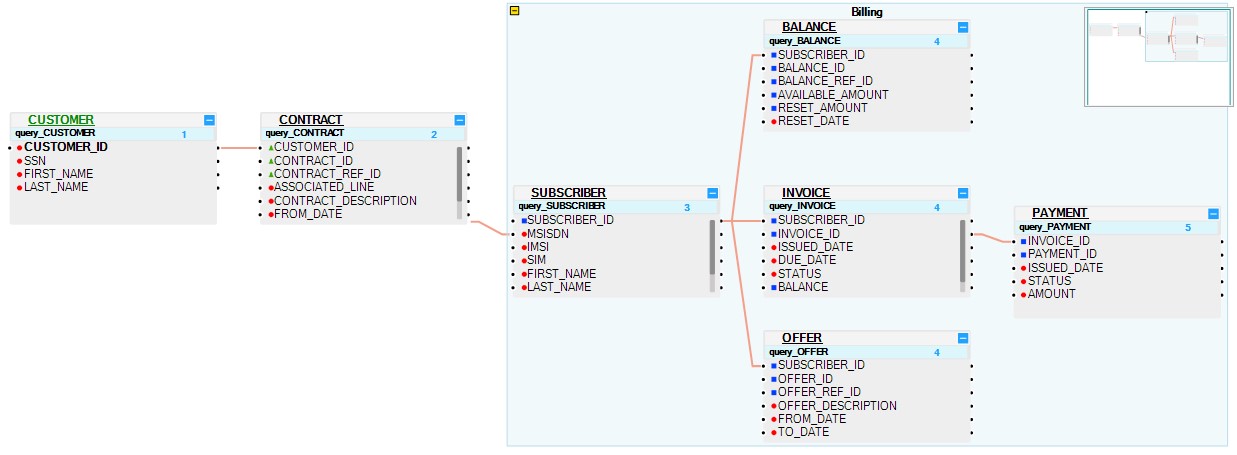
Taking the CONTRACT table from the CUSTOMER LU as an example, the following illustrates key table relationship view options:
Show only predecessor nodes
Show only successor nodes
Show only connected nodes
Display Options
In the LU working area right click anywhere to display a context menu with the following actions:
Navigating an LU Schema
When creating or editing a Logical Unit schema the following options are used to navigate, configure and display information:
- Diagram Outline tab, a representation of the LU schema table’s list.
- Navigation pane, an overview of the LU schema located in the right corner of the working area.
- LU working area, where view options can be set.
Click for more information about the Diagram Outline and Toolbars.
How Do I Use the Diagram Outline?
The Diagram Outline displays an overview of the LU structure and can be used to search for a subset of tables included in the Schema.

To search for an LU table in an LU schema:
- Open the LU Schema window.
- Click the Diagram Outline tab in the right panel.
- In the Search field, type the name of the table or column and then click it in the displayed list. The table or column is highlighted with a green border.
What is the Navigation Pane?
The Navigation pane in the right corner of an LU schema is used to move between the different areas of a Schema. This is useful when looking at large Logical Units with many tables or hierarchy levels.

What are the LU Working Area View Options?
LU Tables relationship options:\ In the LU working area, right click an LU table object to display a context menu with the following actions:
|
set as: root |
Sets the table object as the root of this LU. |
|
show only Predecessor nodes |
Shows only objects and links that are predecessors of this object / field. |
|
show only successor nodes |
Shows only objects and links that are successors of this object / field. |
|
show only connected nodes |
Shows all objects and links connected to this object / field. |
|
show all nodes |
Shows all objects and links in this table. |
|
clear input links |
Clears all input links from objects in the Schema. |
|
clear output links |
Clears all output links from this LU table to its children Table Populations. |
|
clear all links |
Clears all input and output links in the LU tables. |
|
show data |
When clicked, a Query Builder window opens automatically in the newest LU file. |
For Example
Taking the CONTRACT table from the CUSTOMER LU as an example, the following illustrates key table relationship view options:
Show only predecessor nodes

Show only successor nodes

Show only connected nodes

Display Options
In the LU working area right click anywhere to display a context menu with the following actions:


